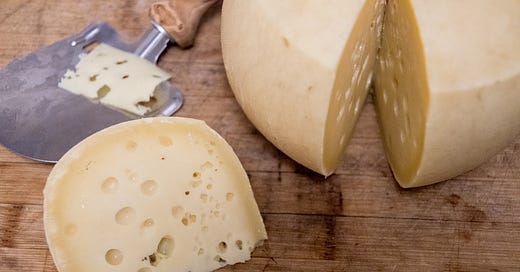
One of the first hard cheeses I wanted to perfect making was Swiss. My family loves Swiss cheese… And they were pretty picky about how it turned out.
I tried ALL the recipes. There were rounds of swiss lining my counter for weeks on end. Then I started mixing different elements of each recipe I thought were improving one or the other. But they just weren’t quite right. The holes were disappointingly lacy. Where were those big shiny eyes I was looking for? Where was that classic nutty flavor?
And then I had a happy little accident.
Like a proper distracted mom, I forgot to add a crucial ingredient at the right time… the Propionic Shermanii. The very culture that even makes the eyes! Thankfully, I remembered before it was too late and my Swiss was blind, I was just 15 minutes late.
And those 15 minutes made all the difference in the world! It gave the culture a chance work with the already active thermophilic cultures. The result was big, beautiful glorious eyes!
A Few Tips for Making Swiss Cheese
If you still struggle with small eyes, you can also try reducing the fat (cream) in your milk first and make sure the milk never gets above 130F, the temperature at which p. Shermanii dies. (Though very few recipes get that hot.)
When making Swiss cheese (or any hard cheese) you’re going to want to use the largest vat and most milk you have available. The recipe today is for a four-gallon batch (though I’m now making six-gallon cheese.) Any smaller and there is simply too much waste in the hard rind. If you’re working with what you’ve got and that means a two-gallon cheese, I would suggest trying to vacuum seal the cheese prior to aging. I just finished the rind development on a Swiss this week and will vacuum seal it to report back if there is any notable flavor difference. I’ll update you here in about three months.
Swiss cheese requires much more babysitting than many other kinds of cheese. After brining, it needs to be washed in the brine for up to a month (first in a cheese fridge, then on a warm counter) for proper rind formation and eye development. You can stop brine washing when both the top and bottom are nicely domed. Then begins the agonizing wait.
Another step that distinguishes this recipe is the cheese is “pressed under whey” before moving to the cheese press. This step is just as it sounds. Enough whey is removed from the warm pot to allow the curds to be hooped into the mold, topped with a follower, then submerged in the whey. I use a half-gallon mason jar filled with warm water as my weight. It holds about 8 pounds of water. The jar may need to be adjusted as the curds shift to keep it from tipping.
Pressing under whey will reduce tiny mechanical holes and the curds to knit together more fully. For a Swiss cheese, this means a smooth elastic paste with only large holes created by the gas.
Finally, worth noting is that because Swiss cheese is made with a thermophilic (warm temperature) culture, you will get the best results when it is pressed in a warm environment. No problem during the summer, but in winter our homes are likely too cold to keep the cultures active. Suggestions would be to press it in a cooler where the warmth would be insulated in for longer or place it close to a wood stove. I use my dehydrator on the lowest heat setting. My pantry is a small walk-in closet so I just shut the doors and let it run without a cover, but you could also drape it with a towel to keep the heat trapped. Just make sure you monitor the temperature at first until you get to know your system.
You’re welcome to download this recipe card to your device to save or print. Enjoy!
Find links to all of my cheesemaking recipes here.


I am far from ready to try Swiss but now I want to jump ahead in my learning curve and do it...ah!
Should I wrap baby Swiss in washed rind?